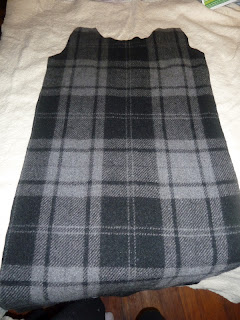
Check out my little caterpillar lol.
This is the view i got every time i tried to take a good photo of the sleep sack i made. He was determined not to model but rather crawl towards the toys which is a bit slippery when you are in a wool sack!
Sleep sacks are the best thing ever in winter when blankets just never stay on those little legs. He's just too much of a wriggler.
I already had a thin merino sleep sack but it was a summer weight one and cost me $50 on sale, the usual price being around $100. So when a friend mentioned she was making them out of recycled blankets i thought i should really have a go at sewing one. Now in truth i had a bit of a look around for a second hand rug but ended up buying some wool fabric on sale. And it turned out they were super easy and quick to make.
~How to make a sleep sack~
First draft a pattern. I traced one off the sleep sack i already had but you could use a loose top to mark the neckline/ armholes. It really doesn't need to be too precise. Note i made this one the same width the whole way down but in hindsight a slightly flared bottom would be a little more roomy for wriggly legs.
Wool fabric outer
Flannelette lining, although you could use anything you had.
I added a batting 100% cotton inner for extra warm but this isn't necessary. Lay all 3 fabrics on top of each other with pattern on top and cut out all together. You will need to end up with 2 backs, 2 inners (if using), and 2 linings.
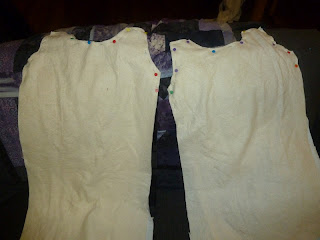
You are going to sew the back and front sections separately. For the back pin 1 lining and 1 outer with right sides together from armhole to armhole. If using a lining pin this ON TOP of the flannelette against the wrong outward facing side (see pic). You are only sewing the armholes and neckline at this stage.
Repeat for the front and you should now have a back and front section with pinned layers.
Sew from one armhole to the other (see left) and turn inside out (see right) so the nice finished right side is now facing out. You now have a back and a front with a nice finished neckline.
Now put the back and front pieces with outer sides together and pins edges (from the armholes) and bottom together.
Turn the whole bag inside out and you have a nearly finished sleep sack. All that's left to do is sew some buttons or velcro onto the shoulders to secure.
Done! Now for a better modelling picture.
My snuggly little bug!
I hope these instructions have been helpful. Feel free to email me if you have any questions.
xxxx


No comments:
Post a Comment